
Securing Coolify with Tailscale
- The Problem
- The Setup
- Disabling Conventional SSH
- Installing Coolify (if not already installed)
- Setup Access of Coolify to the Other Servers
- Setting up a domain for the coolify dashboard
- How to keep services public but ssh secure
- Set certain services to only be accessible via tailscale
- Final Thoughts
TLDR: Your production coolify cluster is not secure by default. Tailscale is a great addition to your security stack.
You might have heard of Coolify before. It is the open source Vercel or Digital Ocean alternative. Coolify allows you to easily deploy your github repos, install open source apps, services and databases and coordinate all of that in a single dashboard. It also has many built-in features like monitoring, logging, backups and more. And Coolify can also handle as the main server for a cluster setup, where the other servers have only the apps and services installed and the coolify server coordinates the deployments and collects the logs and metrics.
The Problem
The Problem however is that Coolify is hosting the powerful dashboard on the public internet for everyone to access. And the communication between the coolify server and the other servers in the cluster is via root ssh access. So when your main server is compromised, all your other servers are also compromised with root access. This should be reason enough to secure your coolify server further.
That is where Tailscale comes in handy. Tailscale is a Wireguard based VPN that allows you to build a private network between your devices and servers and secures it with end-to-end encryption.
The goal of this article is to have a setup where
- the coolify server and the other servers in the cluster can only be ssh'ed via the private network
- the coolify dashboard is only accessible inside the private network
- the coolify server can ssh into the other servers in the cluster
- and all servers (except the coolify server) can host apps and services for the public internet
The Setup
To follow along you need to have one coolify server and at least one other server that is controlled by coolify. You also need to have Tailscale installed on your computer and on both servers. You can find the installation instructions for Tailscale here for your computer and for the servers and you also need to have a Tailscale account of course. Make sure to activate the tailscale service on your computer so it has access to the private network.
Once you have Tailscale installed you can enable the Tailscale service on both servers and activate the tailscale SSH.
sudo tailscale up --ssh
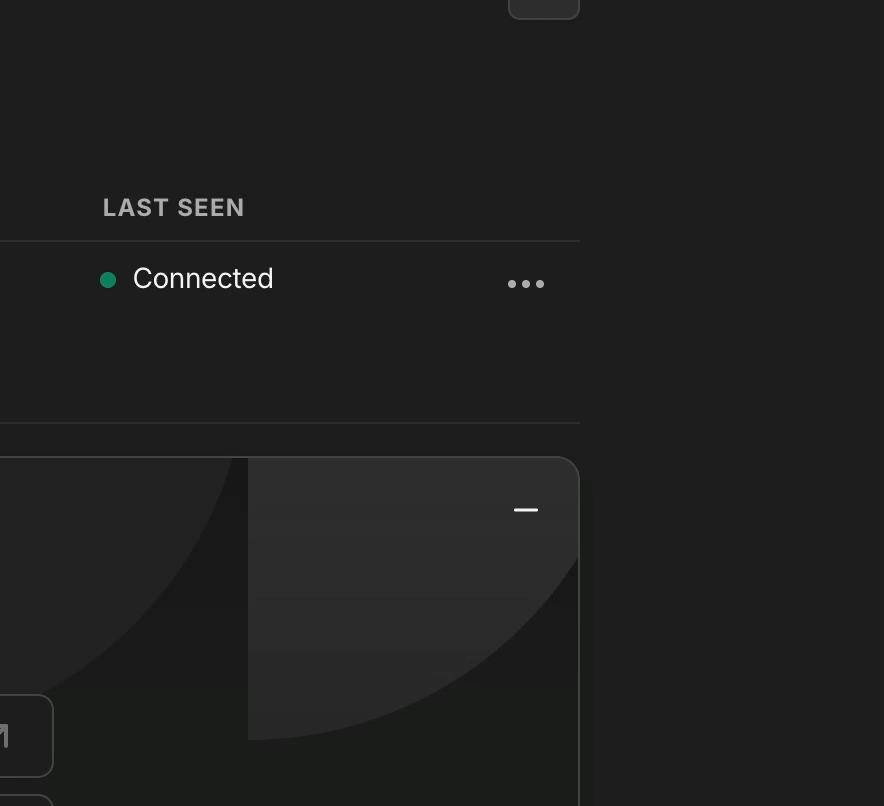
This will start the Tailscale service and activate the tailscale SSH. You should be able to ssh into the server by using the tailnet ip address which you can find on the Tailscale dashboard or with the tailscale ip -4 command.
tailscale ip -4 # your servers tailnet ip e.g. 100.100.100.100

# ssh into the server without password or ssh key
ssh root@100.100.100.100
To make sure your servers do not have to reauthenticate every now and can go to your machines and click "Disable key expiry" for all servers.
Disabling Conventional SSH
To disable the conventional ssh access to the servers we need make sure we have access to the servers via tailscale.
Warning: Make sure you know what you are doing, else you could loose access to your servers. Make sure to backup your servers or have a plan B. And make sure you have successfully ssh'ed into the server via tailscale before disabling the conventional ssh.
Here is also a more detailed guide on how to disable conventional ssh.
Here is a quick summary of what we need to do:
# disable conventional ssh
sudo ufw default deny incoming
sudo ufw default allow outgoing

# allow ssh traffic from the tailscale network
sudo ufw allow in on tailscale0 to any port 22

# enable ufw
sudo ufw enable

# check ufw status
sudo ufw status

# check if OpenSSH is enabled
sudo ufw status numbered

# if OpenSSH is enabled, disable it with the number of the rule from the previous command
sudo ufw delete <number> # 4 in my case: [ 4] OpenSSH  ALLOW IN  Anywhere

# optionally allow all traffic inside the tailscale network
sudo ufw allow in on tailscale0

# reload
sudo ufw reload
sudo service ssh restart
Now we verify if that worked by trying to ssh into the server with the root user.
ssh root@conventional-ip-address # should not work

ssh root@tailscale-ip-address # should work
You need to do this for all servers in the cluster including the coolify server itself. And do not forget to enable http and other ports that you use normally on the server.
Installing Coolify (if not already installed)
This should be straightforward. You can find the installation instructions here.
# as of writing this
curl -fsSL https://cdn.coollabs.io/coolify/install.sh | sudo bash
After the installation you should be able to access the coolify dashboard at <your-tailscale-ip>:8000
Skip the setup wizard if possible and go to the servers page http://<your-tailscale-ip>:8000/servers.
Here click on localhost and change the IP Address/Domain from localhost to <your-tailscale-ip> for example 100.100.100.100 and click on Save.
Info: you disabled the ssh access with your public ip by now. That means coolify can only ssh into itself via the tailscale ip address of the same server. That seems confusing at first but that is actually how coolify works. The main server oddly ssh'es into itself.
Now click Validate Server and wait for it to be ready.
If your server like mine is unable to validate the server you can try to restart coolify and after that it should work.
# if validation failed try to restart coolify
# ssh into your coolify server via tailscale
ssh root@<your-tailscale-ip>
# restart coolify
docker restart coolify coolify-realtime coolify-db coolify-redis
Setup Access of Coolify to the Other Servers
To allow the coolify server to ssh into the other server(s) you need to adjust the tailscale config on the dashboard.
First we need to create new tags to tag the servers. This can be done in the tag settings page.

I created two tags: coolify and prodserver but you can name them whatever you want and create more for nuance. Next we need to tag the servers with the tags we created. This can be done in the server settings page. Click on the three dots and select Edit ACL tags.

Your coolify server should have the coolify tag and the other server(s) that are in the coolify cluster should have the prodserver tag.
Now you can go over to the visual SSH Settings and add a new rule with the Add rule button. Make sure it looks exactly like this:
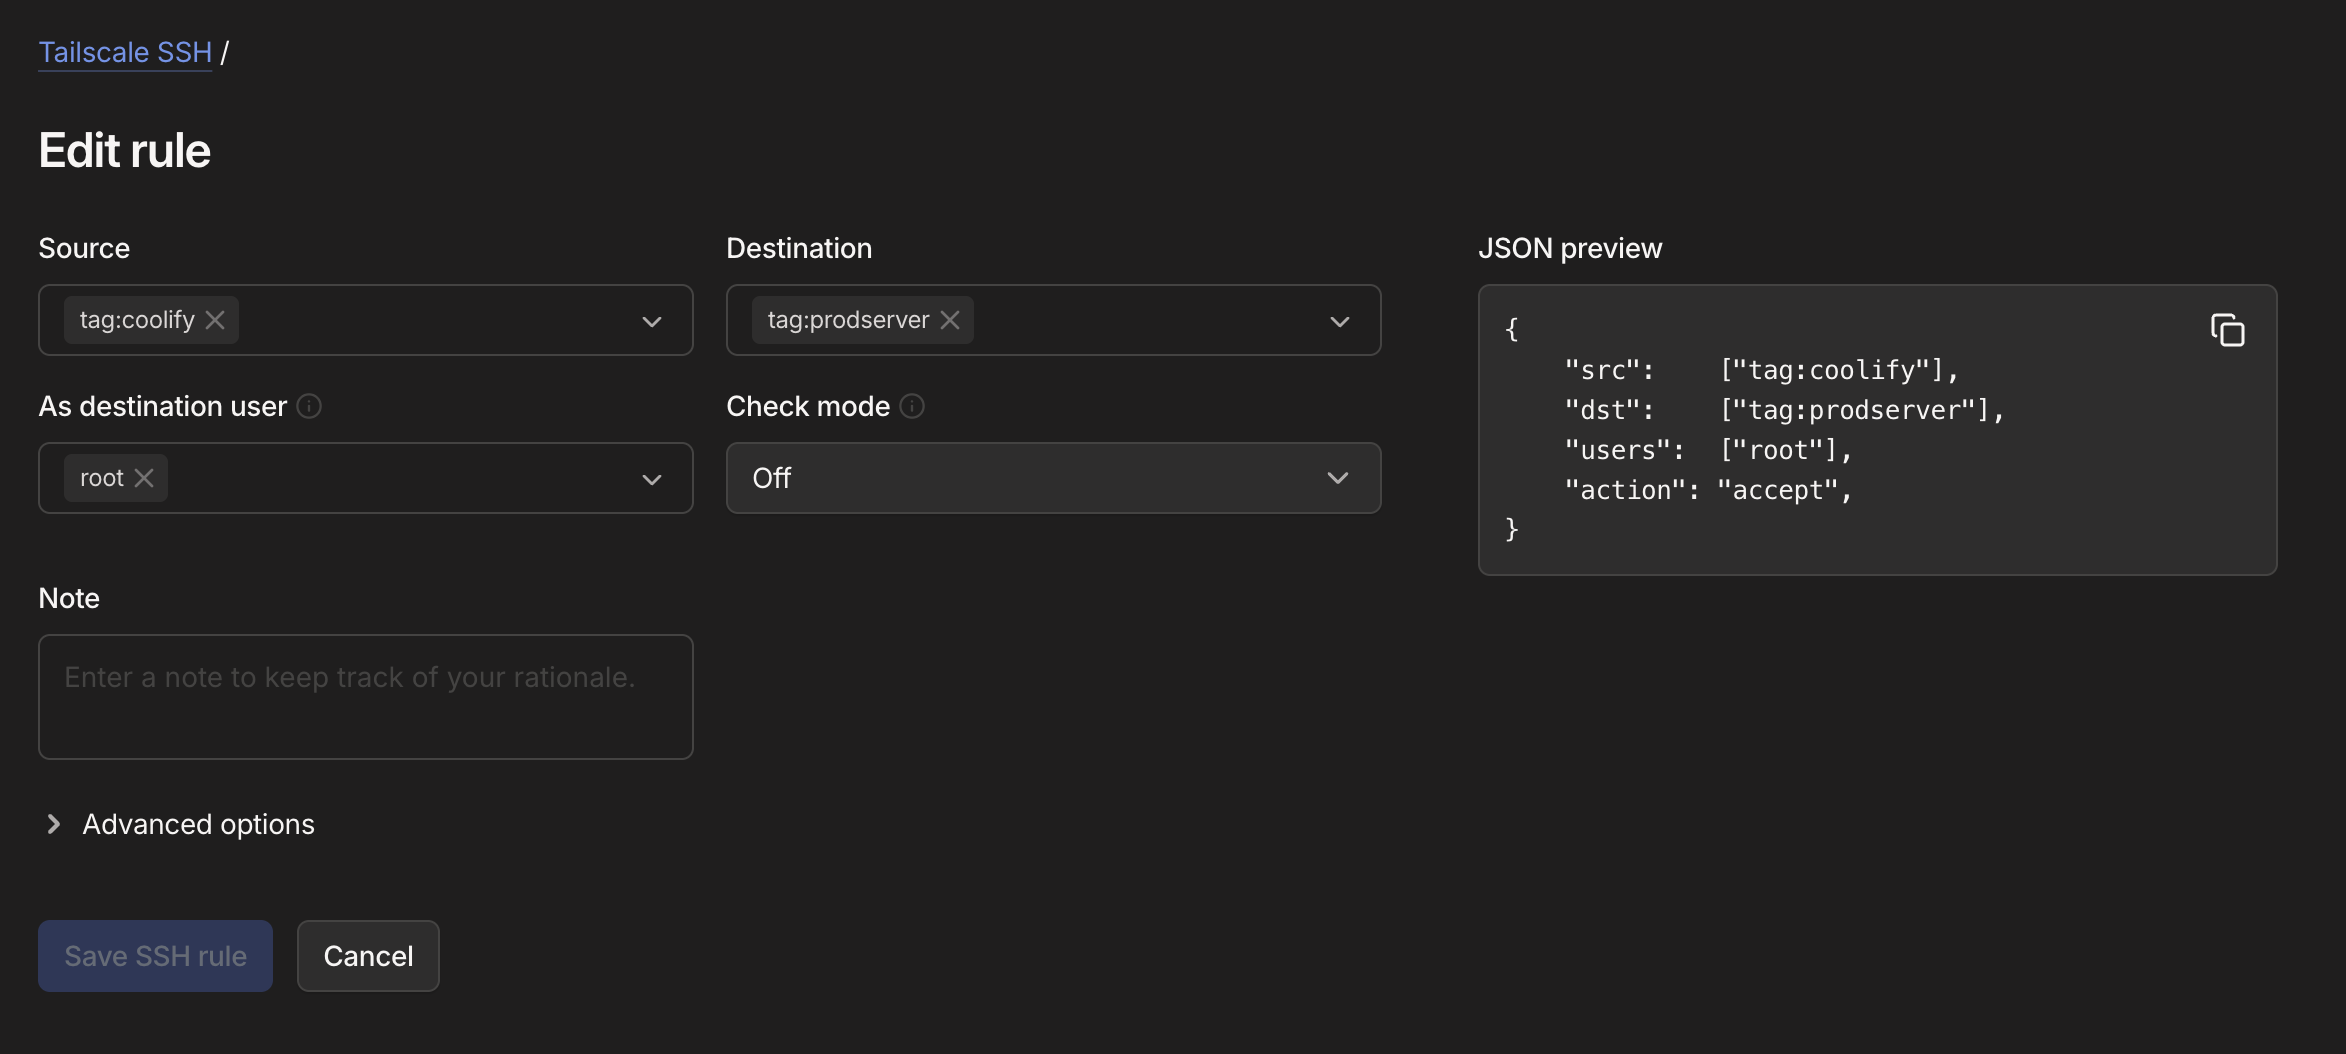
To test if it worked you can ssh into your coolify server and try to ssh into the othr server(s)
# inside the coolify server
ssh root@other-server-ip-address # coolify server should be able to connect to the other servers

# inside the other server(s)
ssh root@coolify-server-ip-address # should NOT work as we only allowed ssh from the coolify server to the other servers
Adding the servers to the coolify cluster
Safety First: Make sure to download your latest coolify backup and save your
APP_KEYas described here if you have an already running coolify server.
At this point we need to add the servers to the coolify cluster. Or modify existing servers to use the new tailscale ip address. The conventional ssh is disabled but coolify can still ssh into the other servers via the tailscale ip address.
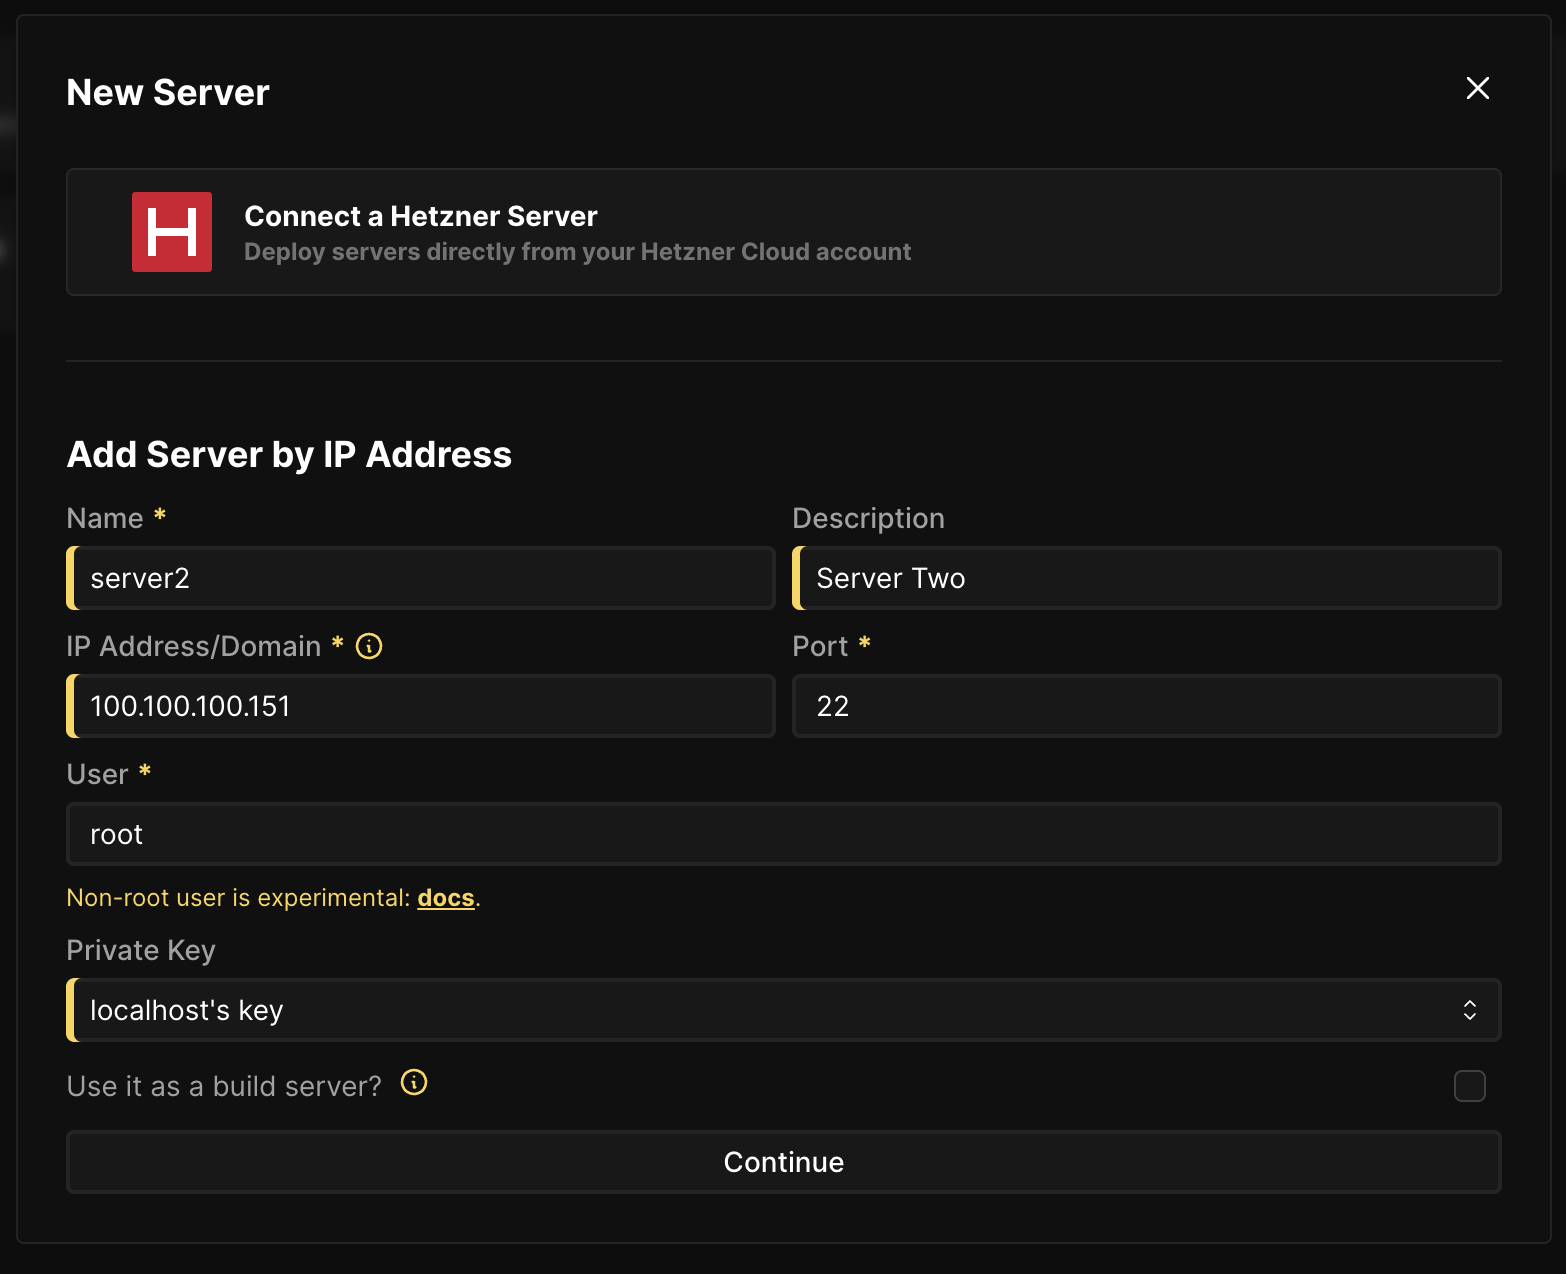
To add new servers go to the Servers page and click on Add. Fill in the form with the server details and click on Continue. For the SSH Private Key you can leave it at the default as tailscale doesn't need a private key at all.
To modify existing servers go to the Servers page and click on the server you want to modify and then you need to change the IP Address/Domain to the new tailscale ip address like so:
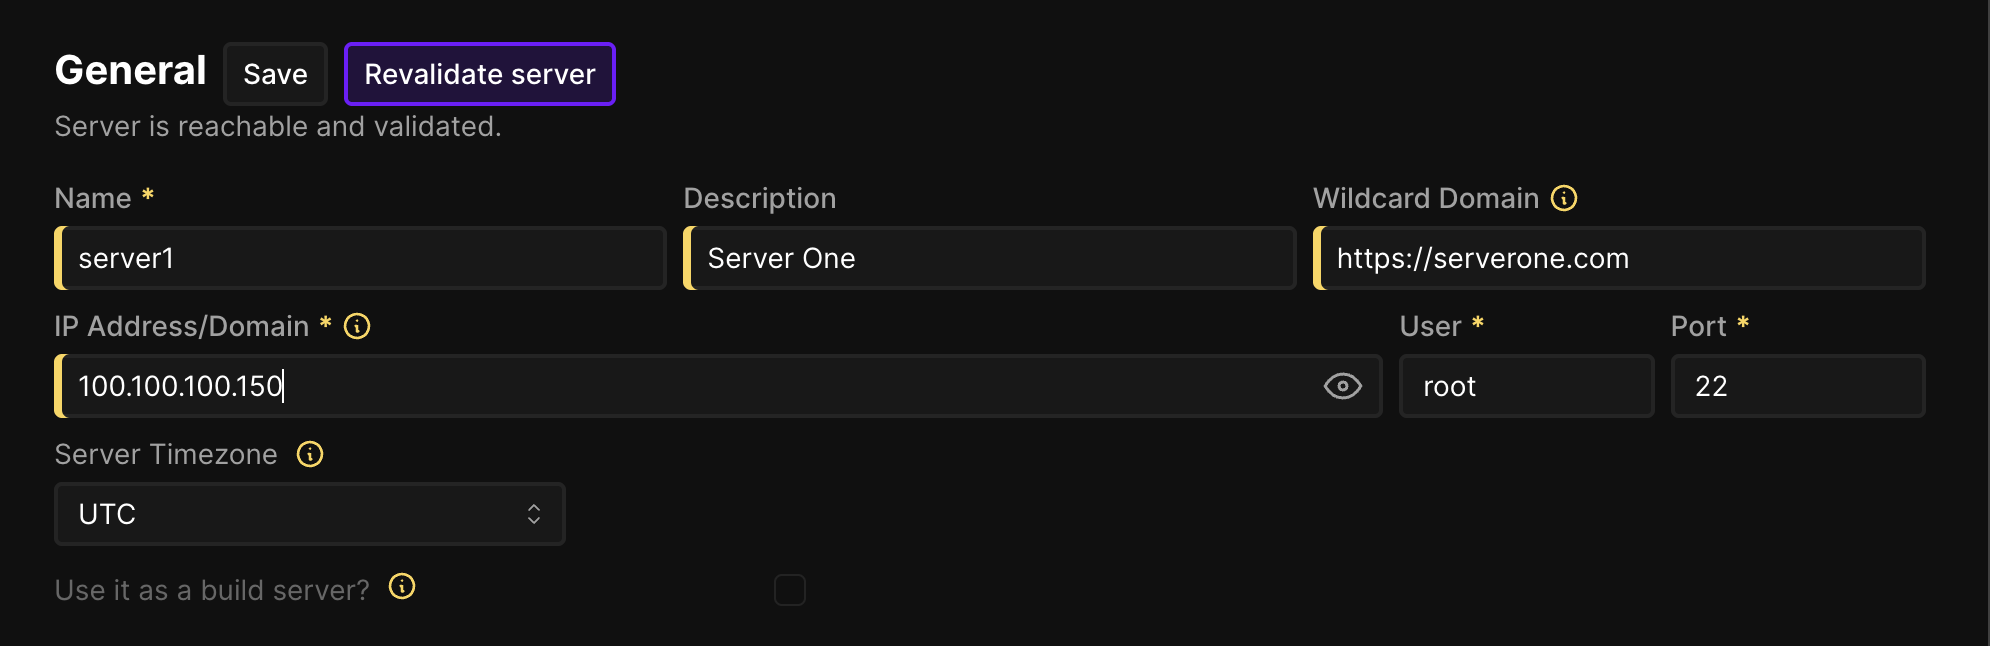
After that you need to click on Revalidate Server and wait for it to be ready. If it fails you can try to restart coolify docker restart coolify coolify-realtime coolify-db coolify-redis and after that it should work.
You should now be able to ssh into the other servers via the coolify server.
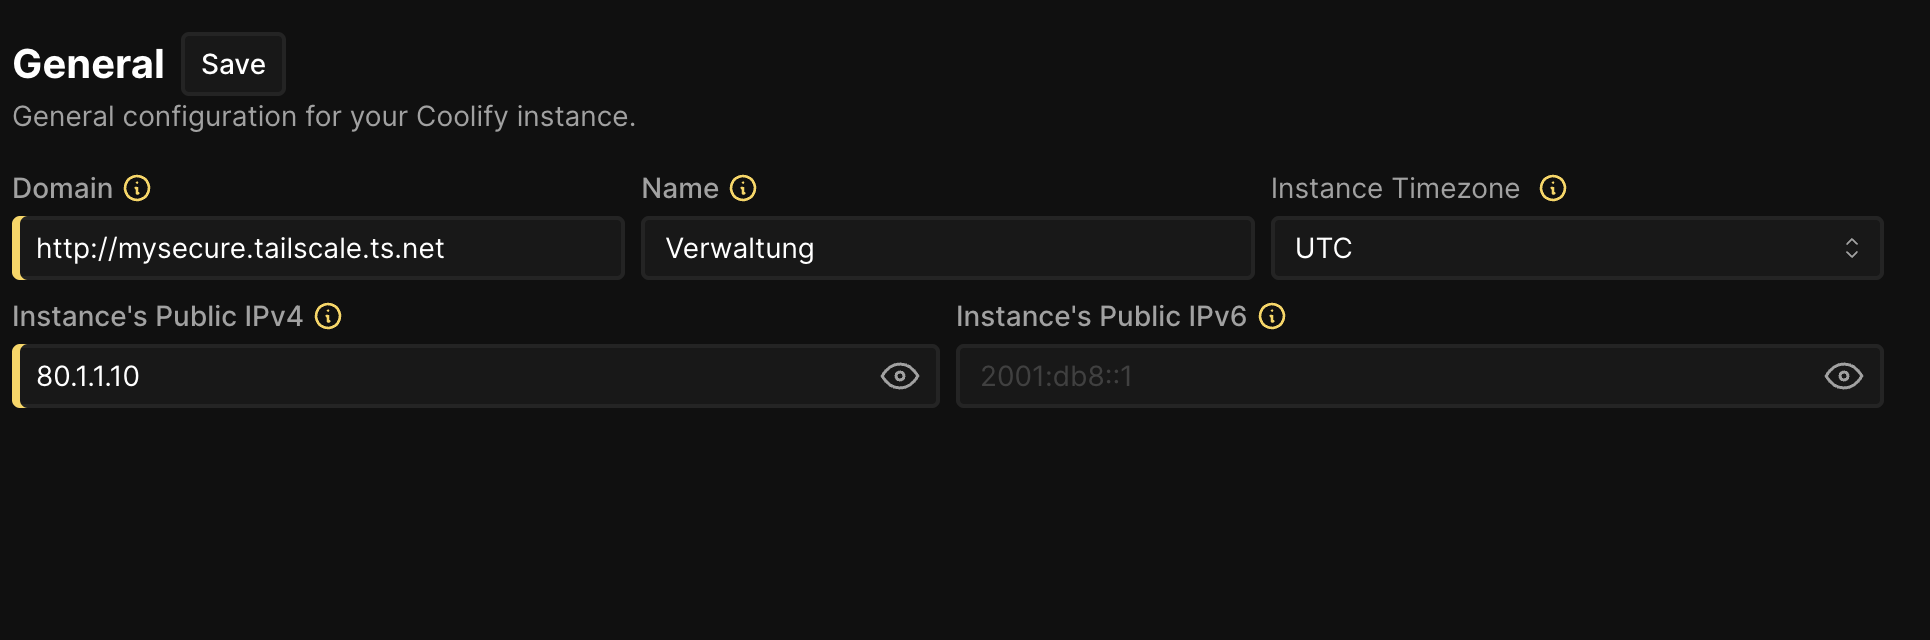
Setting up a domain for the coolify dashboard
You don't want to deal with IP addresses all the time, so you can set up a domain for the coolify dashboard. Go to Settings and change the Domain to the domain you got from tailscale.
Question: Is there a way to keep the main server accessible via the public internet but hide the dashboard behind tailscale?
Well yeah that is possible too, and it make sense if all you have is 1-2 servers. To achieve this you need leave the main servers IP address as is and only change the dashboard domain to the tailscale domain.
Go to the Settings page and change the Domain to the tailscale domain. You do not even have to change the IP address, just the domain. This way traefik only proxies the tailscale domain to the dashboard and not the public IP address.
How to keep services public but ssh secure
Ideally we want to keep our services publicly accessible with a wildcard domain but still secure the ssh access to the servers. This doesn't need any further setup actually, just point a domain wildcard to one of your coolify server's public ip (not the tailscale ip) and you are done.
# dns setting
A record *.services.mydomain.com <your-coolify-server-public-ip>

# to check if it worked
dig random.services.mydomain.com # should resolve to the public ip of one of your coolify servers
To make things simpler you can add this Wildcard domain to the server settings page in coolify. This way new services will automatically be added a generated wildcard subdomain of your domain.
Make sure your server is accessible via the public ip, you may need to open ports in your firewall for the services you want to expose.
# open ports in your firewall
sudo ufw allow 443/tcp
sudo ufw reload
This way our server is accessible via https publicly and ssh securely via tailscale.
Last bit to make your coolify server even more secure
Did you know that docker containers can change the iptables causing your ufw rules to be broken? This is a known issue and there is a solution for it. In terms of coolify this means that it your public IP could still publish the coolify dashboard port 8000. To fix this follow the steps in the this article about docker not respecting ufw
Set certain services to only be accessible via tailscale
This will be added soon...
Final Thoughts
Tailscale is a great addition to your security stack. It is easy to setup and use and it can help you secure your servers further. If you have a production server you should consider using it.
Thanks for reading!